


A Simple Way to Improve Test Automation Using MCP Servers
Working with UI test automation can get annoying pretty quickly. A small change in the app can break several tests, and you end up fixing the same problems again and again. After a while, it feels like you’re spending more time repairing tests than actually writing them.
I felt the same way. So I started looking for an easier workflow. That’s when I tried using Claude Desktop, Playwright MCP, and File MCP together. Instead of treating them as separate tools, I used them as a small system that helps me create and manage tests with less manual work.
This setup made everything smoother. I can generate Playwright tests, save them directly into my project, and open the files in VS Code without copy-pasting or switching between apps.
In this article, I’ll show you step by step how I use this setup, so you can try it in your own project too
What is an AI Agent? (Think → Decide → Act)
Most people think AI tools just “generate text.” But an AI Agent is different.
A real AI Agent can :
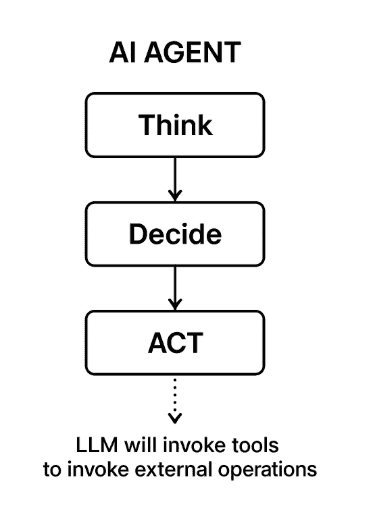
AI Agent Process
In simple An AI Agent is like a junior tester who not only writes ideas but also performs actions using tools connected to it.
This is why automation becomes smoother — because the AI isn’t just suggesting code; it’s actually doing part of the work.
What is an MCP?
MCP is a newly open‑sourced standard created to help AI assistants work more effectively by connecting them directly with
your system
your files
your tools
your project folders
Instead of giving AI only text, MCP allows it to access the real data and environment where your automation code lives.
Think of like this Without MCP, an AI is blind. With MCP, it can see your project, interact with it, and help you like a real teammate.
How MCP Works:
MCP acts as a universal bridge between AI systems and the actual data they need.
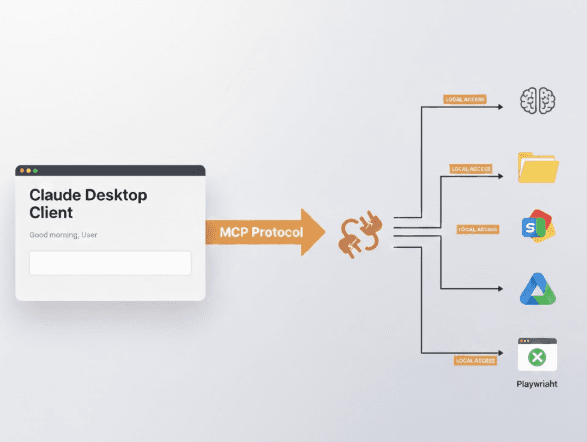
Claude → MCP → Local Tools Workflow
There are two parts:
A) MCP Server
This exposes capabilities — like reading files, generating Playwright tests, updating code, saving changes.
Examples:
Playwright MCP server → generates + updates tests
File MCP server → handles file creation/editing
Shell MCP server → runs safe terminal commands
B) MCP Client
This is the AI app you use.
Examples:
Claude Desktop
VS Code extensions
Web-based LLM clients
The client talks to the server → server performs the action → results come back.
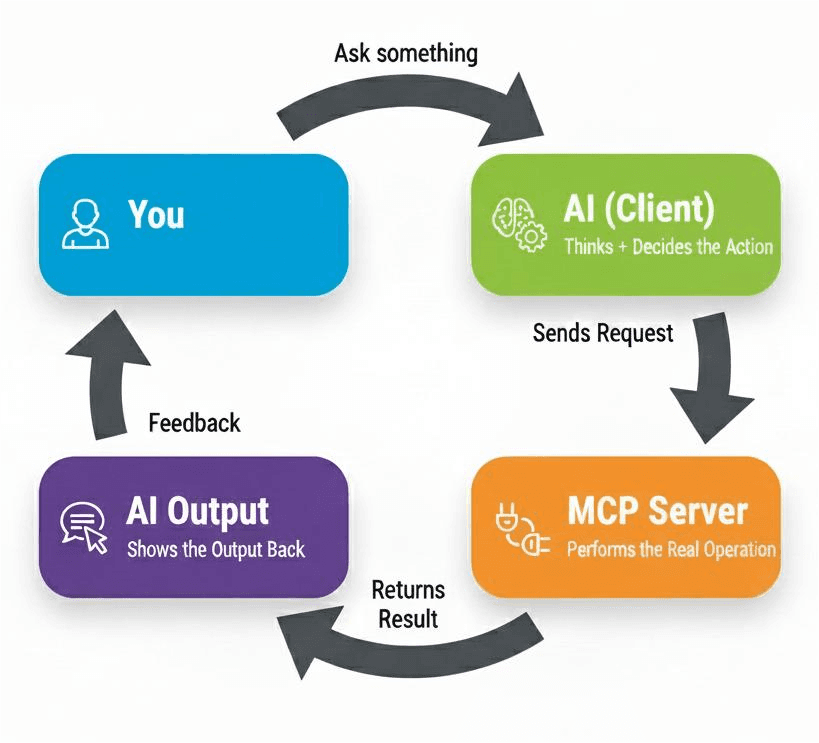
How MCP Works in a Simple Flow
This is what makes automation smoother.
Types of MCP Tools Testers Commonly Use
These aren’t official categories — just practical ones that testers encounter every day.
1. Automation Helpers (Code Generators)
These tools help by generating code automatically, but they won’t make changes to your existing files.
2.File-Interaction Tools (Work With Your Project Files)
Tools that let AI create and update your real project.
Here the AI can:
create new test files
maintain POM structure
update scripts
organize folders
This is what File MCP provides — and it’s a game changer.
3. Action-Execution Tools (Run Automation Steps)
These tools let the AI function like a real automation assistant.
Tools such as Playwright MCP can:
run tests
open browsers
validate selectors
debug failures
re-run tests
This is the foundation of true end-to-end AI-powered automation.
Example 1:(when File MCP is not turned on):
I asked Claude Desktop to create a folder, but it wasn’t able to. It explained that it didn’t have access to my files and suggested either enabling the desktop tools or creating the folder manually.
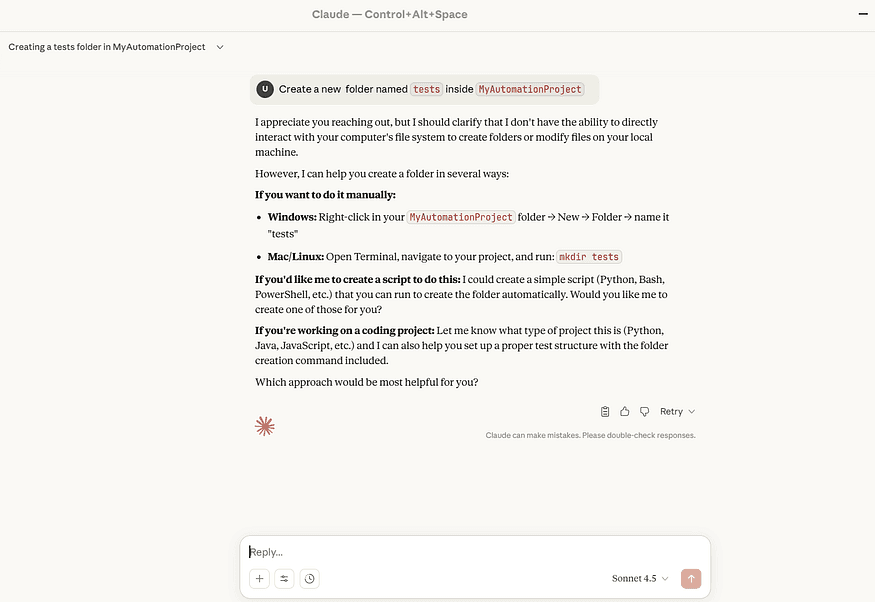
Claude Response without File System MCP
Example 2:(when Playwright MCP is not turned on):
When I asked Claude Desktop to open the URL and fill the web form, it couldn’t do that either.
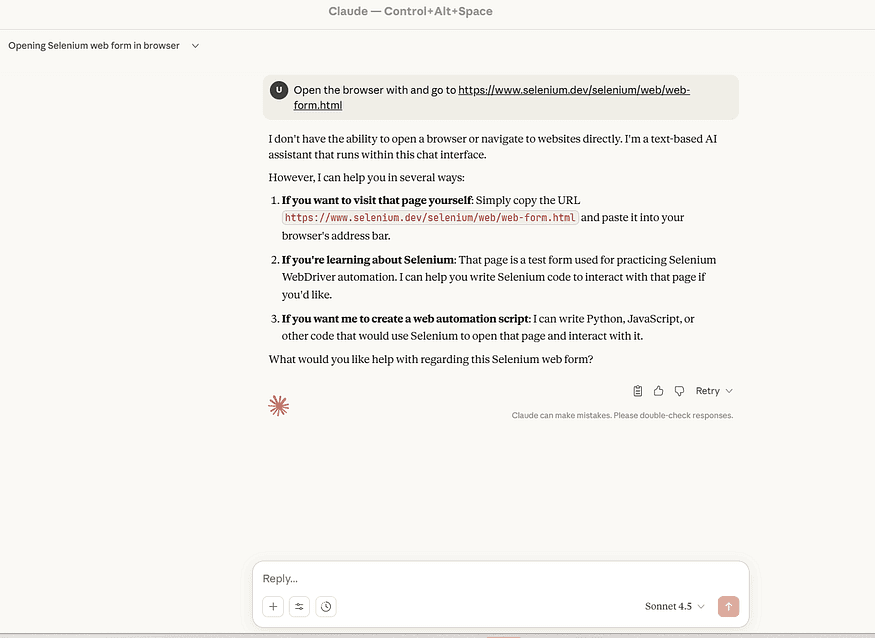
Claude Response without Playwright MCP
Now Let’s See the Magic — Adding MCP Changes Everything
After seeing how limited Claude is without File MCP and Playwright MCP, now it’s time to unlock the real power.
Before repeating the examples, we must first add both MCP servers to Claude Desktop.
And trust me — this is the moment your automation workflow transforms completely.
Step 1: Adding MCP Servers in Claude Desktop
* Open Claude Desktop
Go to the menu:
Settings → Developer → Edit Config → Open Config File
Click “Edit Config
Open the Config File In VS code
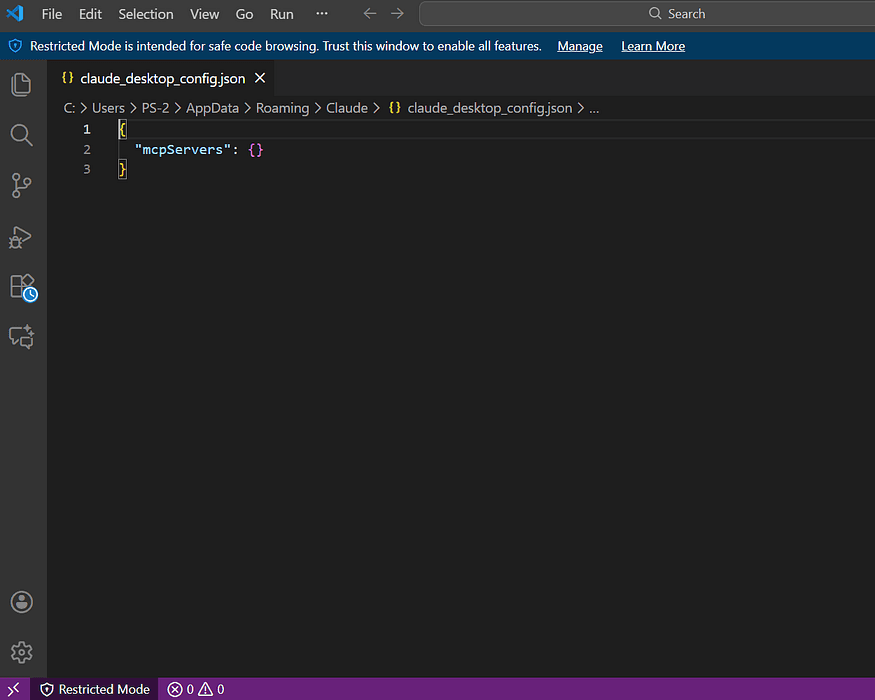
After clicking Edit Config, the config file opens in VS Code, and it shows an empty JSON structure like this
Add File System MCP
This allows Claude to:
create files
update files
generate project structure
save POM folders
upload PDFs / test data
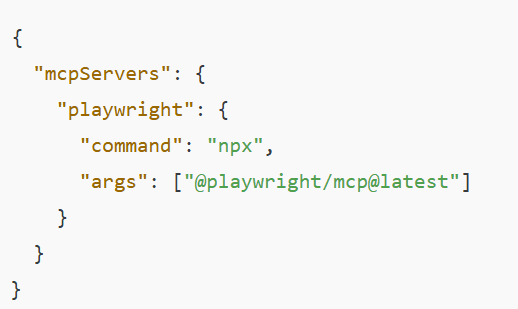
Add this :
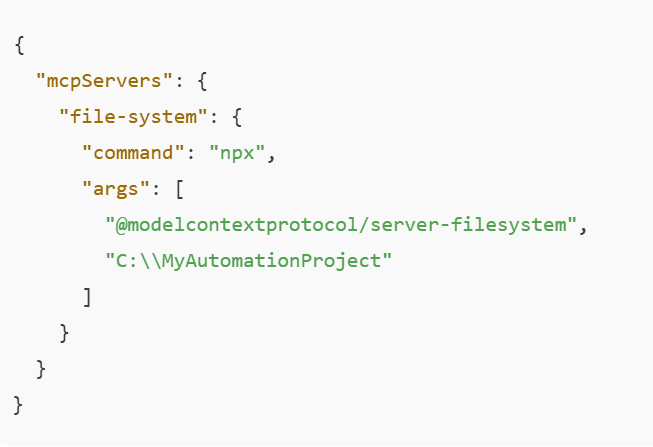
Claude can now read/write inside path “C:\MyAutomationProject”
Add Playwright MCP:
This allows Claude to:
launch browsers
run Playwright tests
debug selectors
execute automation in real-time
even show headed mode browser windows
Claude is now connected to Playwright MCP
After adding both MCP servers, your config file will look like this.
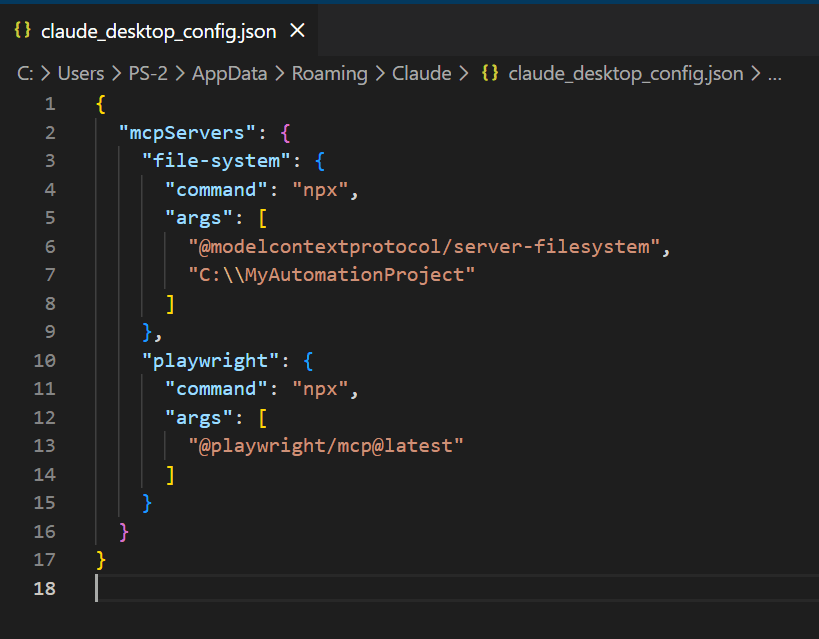
MCP config with both servers connected
Now just save the file and restart Claude Desktop to apply the changes.
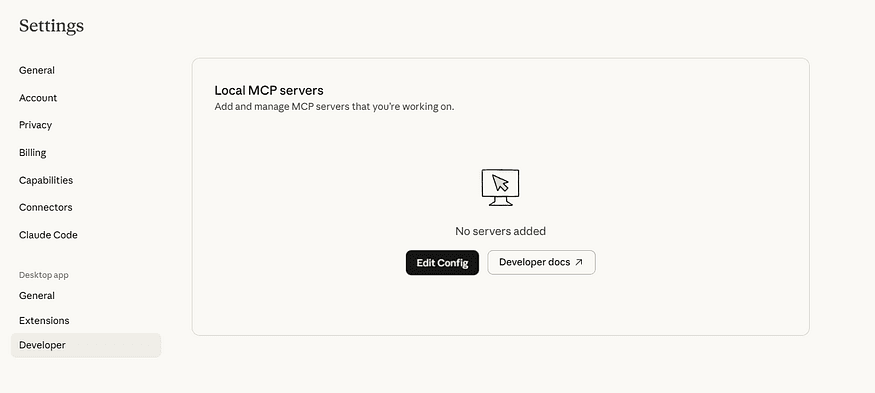
After adding both servers, you’ll now see them listed under Settings → Developer → Local MCP Servers
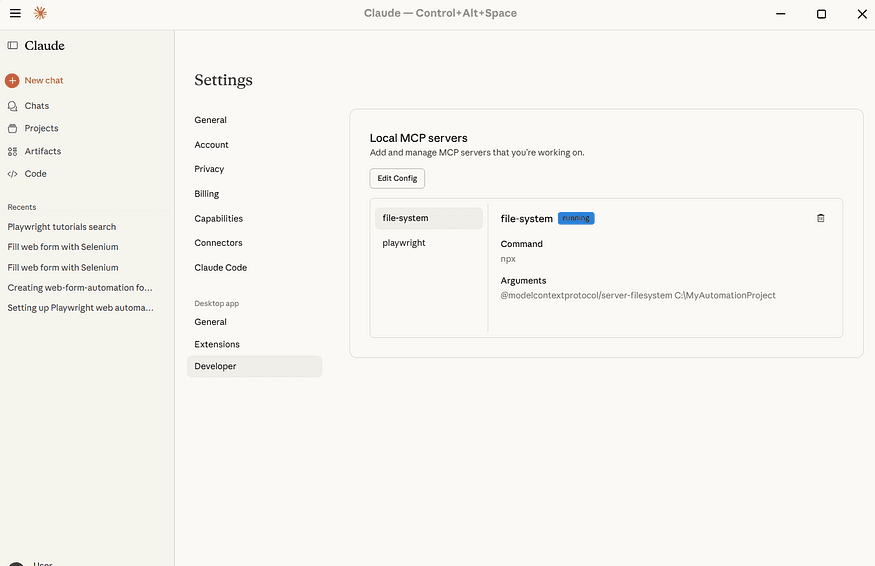
Both MCP servers are now added and running inside Claude’s Developer settings.
Once you see them running, you’re ready for the magic.
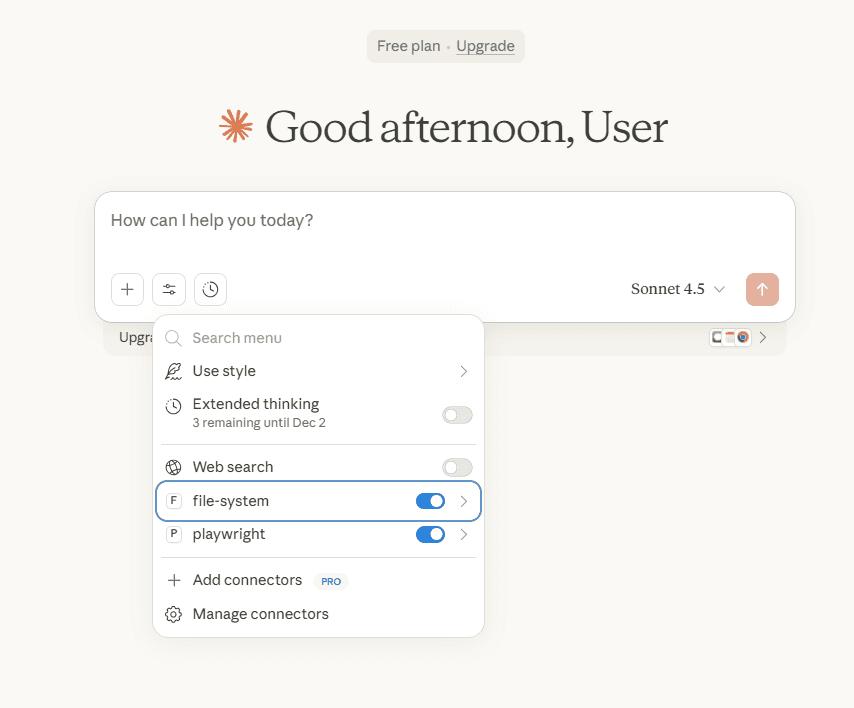
MCP toggles visible under the chat window
Here you can enable or disable each MCP server — make sure File-System and Playwright toggles are ON.
When we expand the Playwright MCP section, we can see the list of available methods inside it
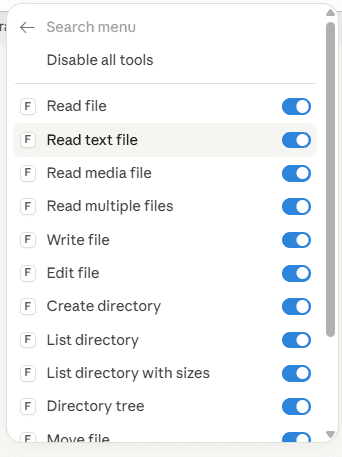
File-System MCP tool list
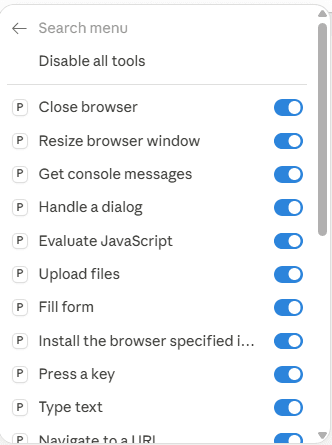
Playwright MCP action list
Step 2: Run the Same Scenario Again (With MCP Enabled)
Earlier, without MCP, Claude could only talk.
Now let’s ask Claude the same thing again:
Now that our MyAutomationProject folder is ready, we will create the inside structure using the File MCP.
Prompt:
Create a folder named tests inside MyAutomationProject
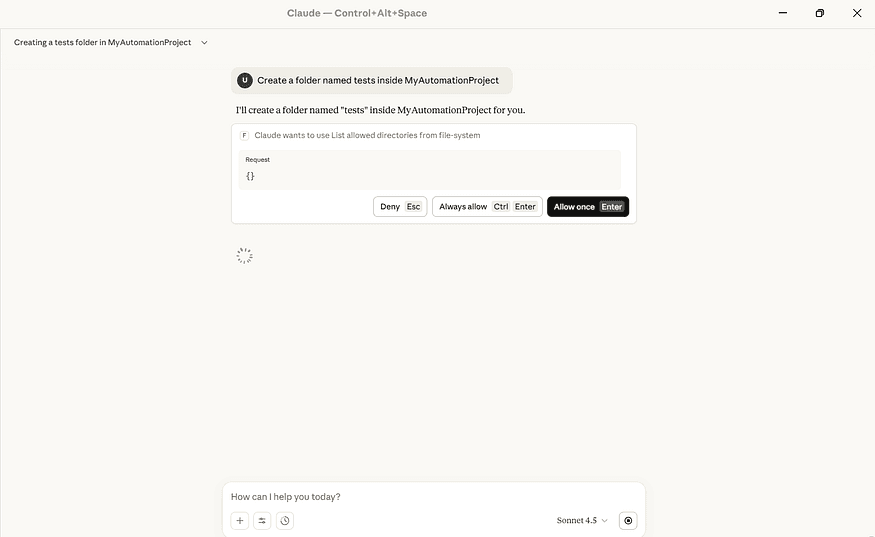
Grant access: Always allow
Click “Always allow” so Claude can manage files inside your project.
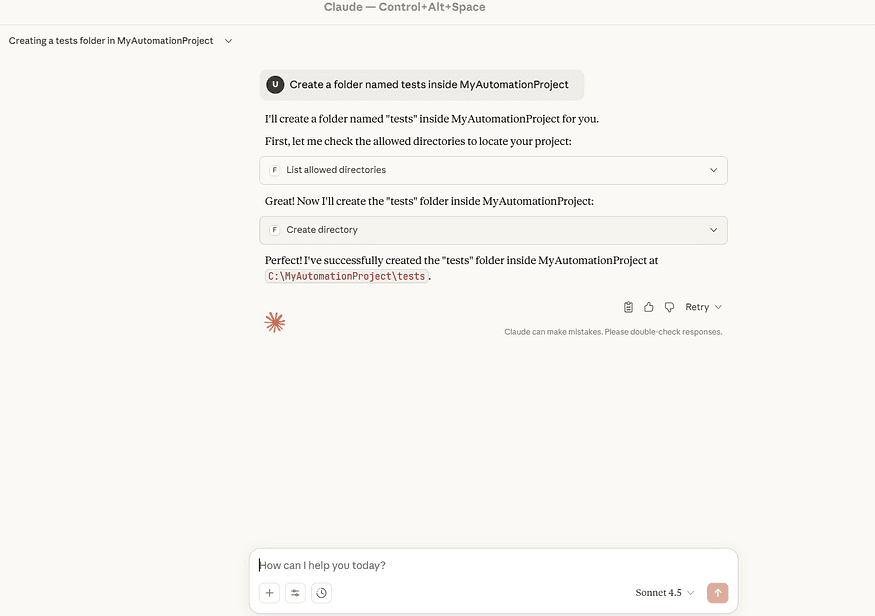
Claude has created the new ‘tests’ folder automatically
Next, create an empty file where our Playwright code will be saved.
Prompt:
Create a file named webFormTest.js inside the tests folder.
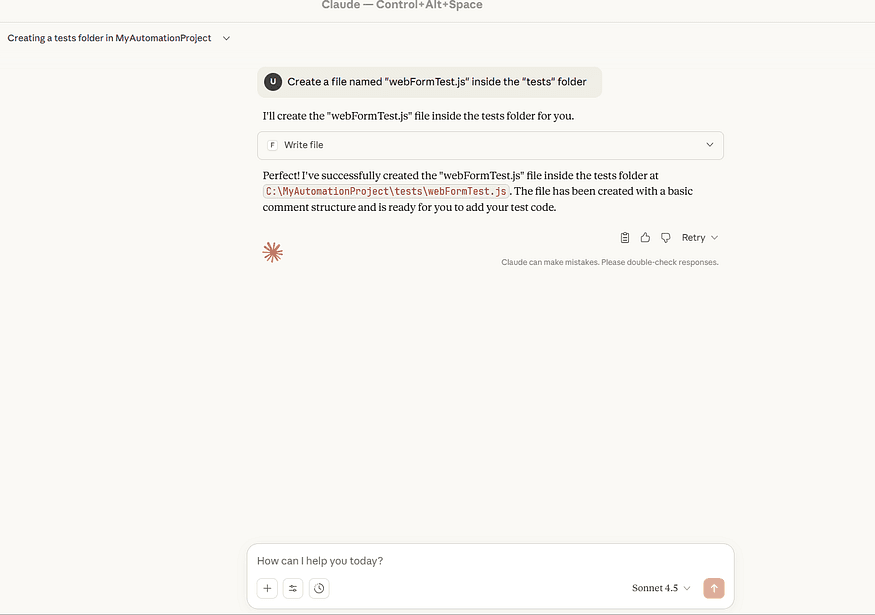
webFormTest.js file successfully created inside the tests folder.
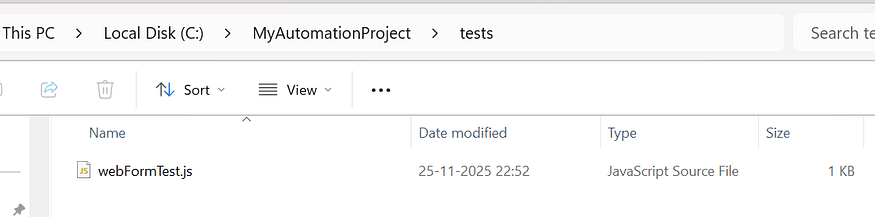
File saved locally
At this point, we have only created the webFormTest.js file, which will hold our test script. The next step is to use Playwright MCP to automate the browser actions and write the generated code into this file.
First, let’s start automating the same scenario we performed earlier, but this time using Playwright MCP
Prompt:
Open the browser with Playwright and go to https://www.selenium.dev/selenium/web/web-form.html

Playwright MCP successfully opened the Selenium web form page
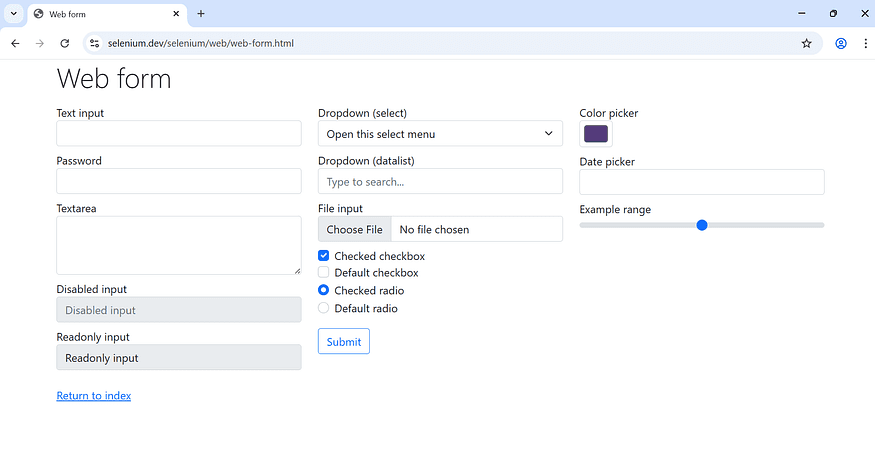
Web Form page opened via Playwright MCP
Now that the browser has opened the page, we can begin automating a few actions such as entering text, selecting dropdown values, choosing a date, uploading a file, and selecting radio buttons

Form-automation prompt used in this demo
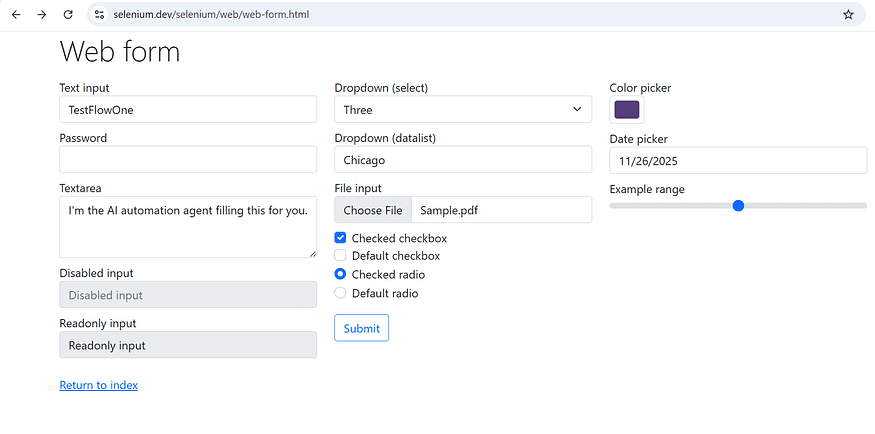
Web form filled automatically using a prompt
With all interactions completed, Claude generates a final summary along with the saved Playwright script
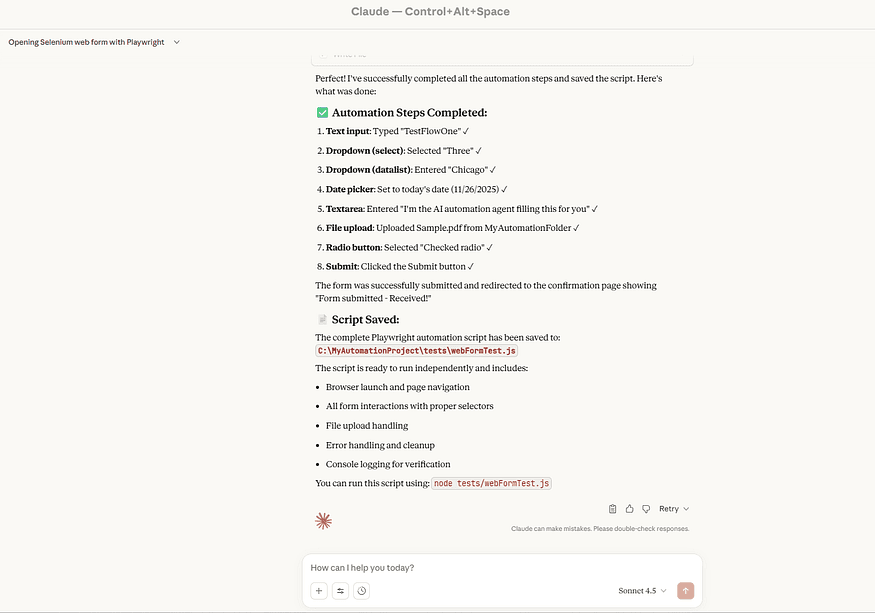
Final automation report showing all actions and script path
Now let’s open the generated WebFormTest.js file in VS Code to review the complete Playwright script that was created from our automated steps.
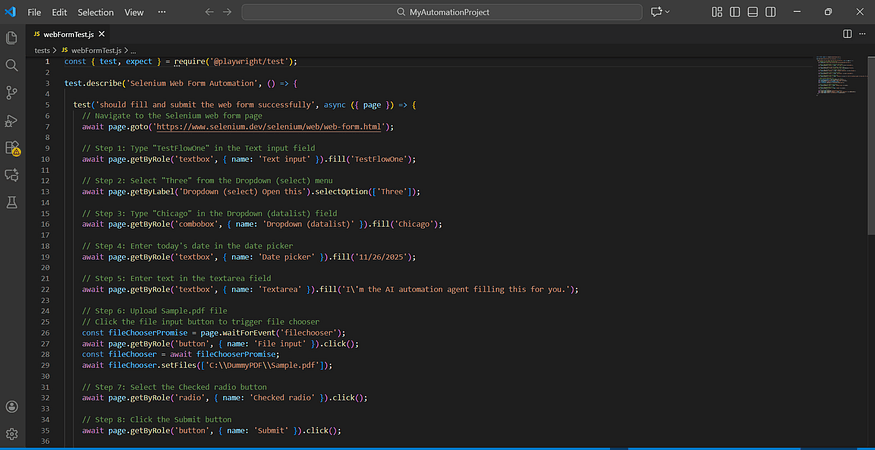
WebFormTest.js Opened in VS Code
Before executing the webFormTest.js script in VS Code, ensure that Playwright and its required components are properly installed. This step is necessary because a fresh project does not include the Playwright test runner or browser binaries by default.
1. Install Playwright Test Package
Open your terminal inside the project folder and run
This command installs the Playwright testing framework, which provides the APIs used in your script.
2. Install Playwright Browsers
Next, install the browsers that Playwright uses to run tests:
This downloads Chromium, Firefox ensuring your test can run across different engines if needed.
3. Run Your Test
Once everything is installed, execute your test with:
Playwright will launch the required browser, run your automation steps, and display the test results in the terminal.
Conclusion
Using MCP servers with Claude makes automation much easier and more practical for testers. Instead of switching between tools or fixing the same issues again and again, Claude can now work directly inside your project and handle many tasks for you. With File MCP and Playwright MCP, you can create tests, run them, debug selectors, organize folders, and generate Playwright scripts — all with simple prompts.
And this is just the start. The same MCP setup can also support API testing, database checks, log reading, test data creation, and even bug management tasks like writing reports or reproducing issues. MCP allows AI to help with almost everything testers do on a daily basis, not just UI automation.
Overall, testers get a smoother, faster, and more reliable workflow, while opening the door to even more AI-powered testing possibilities.