AWS CodeCommit — Pull Request Creation and Approval
Objective :
To create a pull request to merge the feature branch into the master branch after various approvals.
Step 1 : Create a feature branch and push the code changes into the feature branch.
Through AWS Console : — The developer who creates the pull request (another IAM user) needs to have console login access for the particular AWS account.
Step 2 : Create Pull Request
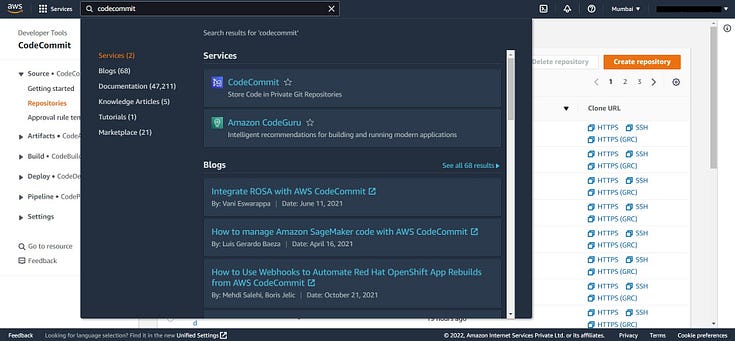
Select CodeCommit in the services search bar.
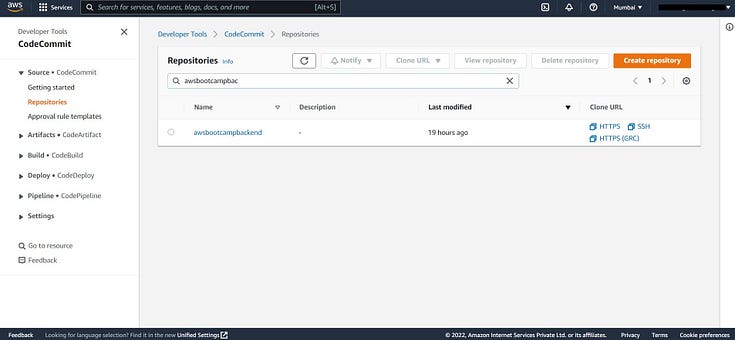
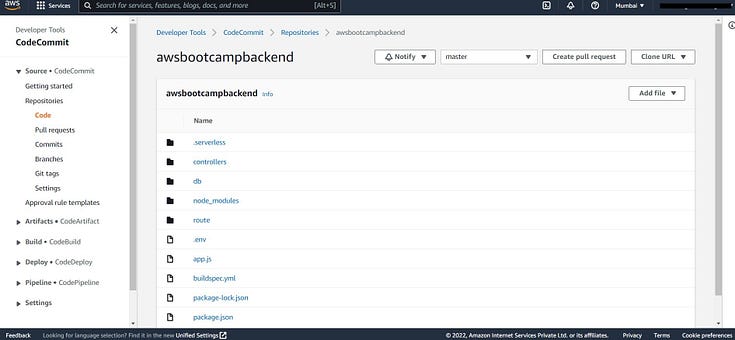
2 . Select the repository in which you made the code changes and would like to create a pull request
3. Select Create pull request
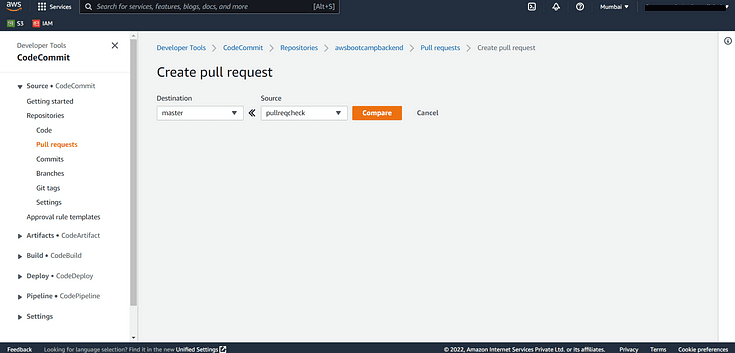
4 . Select the source and destination branches (usually, destination branch will be master) and select Compare
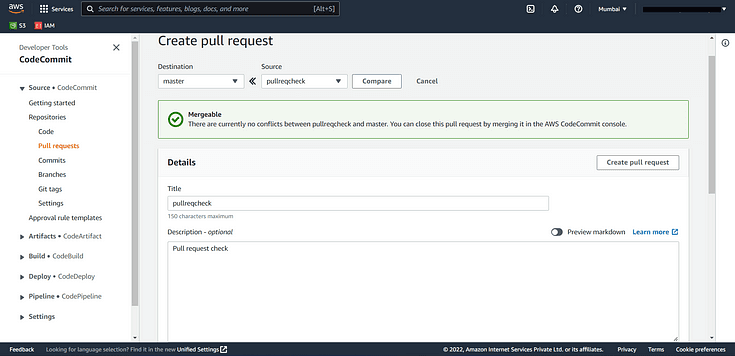
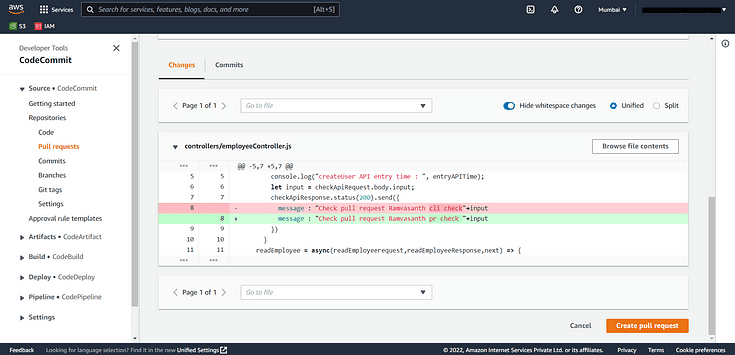
5 . Select a title and description (optional) and check the Changes made in the commit of the source branch and select Create pull request
Step 3 (optional) : Specify the approval rule details
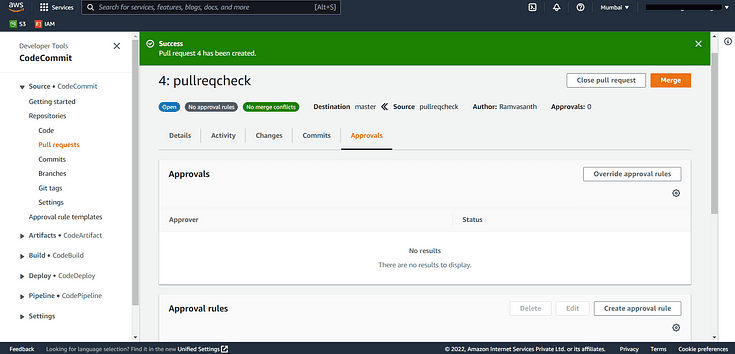
The pull request gets created successfully. Select Approvals and create approval rule for the pull request by selecting the Create approval rule
Select Create approval rule and specify the approval rules
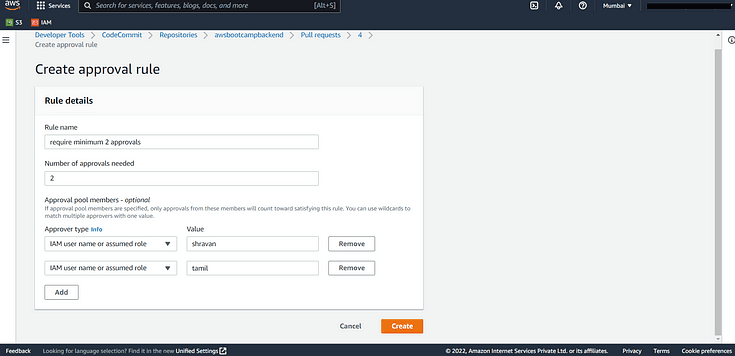
NOTE : The rule will not be satisfied unless the number of approvals is fulfilled and also, the specified IAM users approve the pull request. ( Eg : If the number of approvals is 1, but there are 2 IAM users added as reviewers, the rule does not satisfy unless both the IAM users give approval )
Approval Status :
The approval rule is not satisfied so far and the status will be “Rules not satisfied”
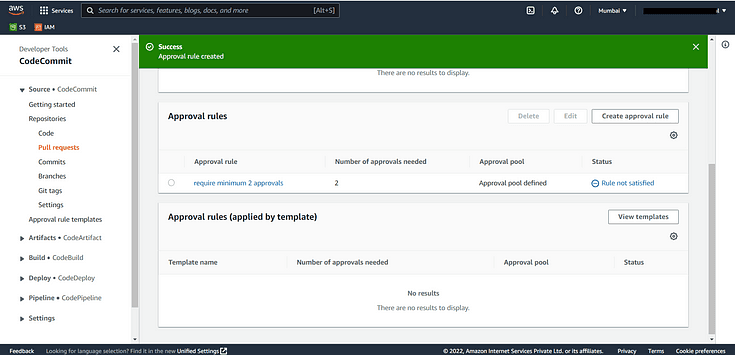
Step 4 : Approve Pull Request
Select the Pull request you want to approve.
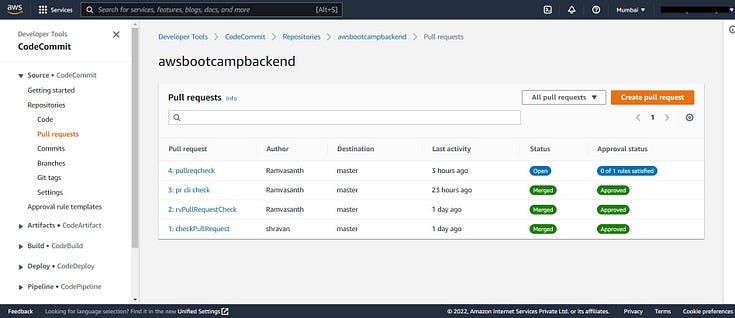
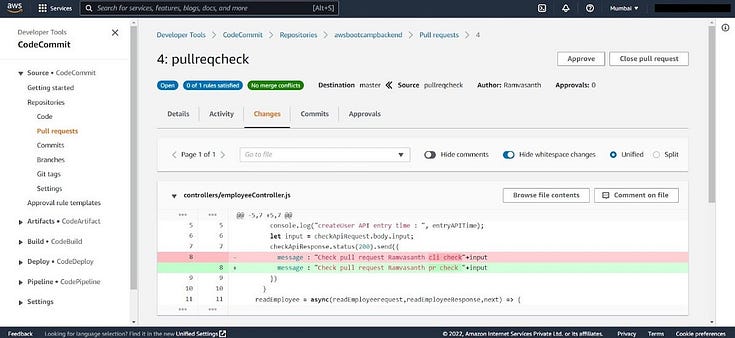
In Changes, the reviewer can view the changes and select Approve to approve the changes.
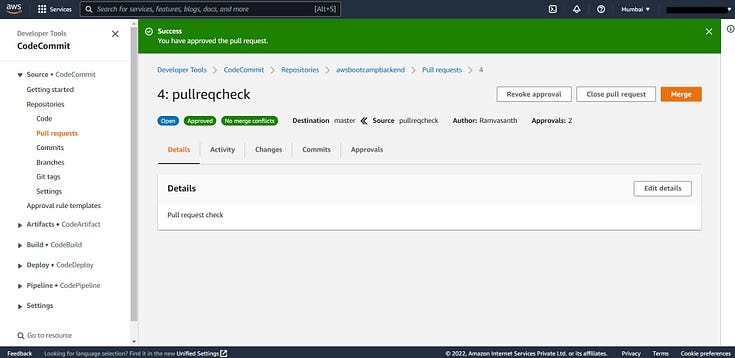
Approval can be revoked by selecting Revoke approval
Step 5 : Merge the Pull request
After all approvals are done, the reviewer can merge the code into master branch
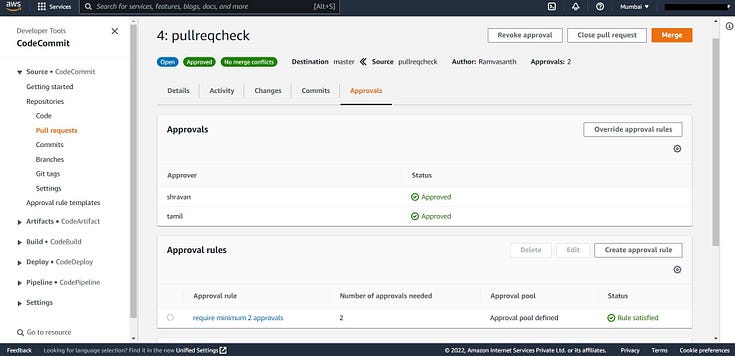
After selecting Merge, select Fast forward merge, check the option — Delete source branch “source_branchname” after merging
Select Merge pull request
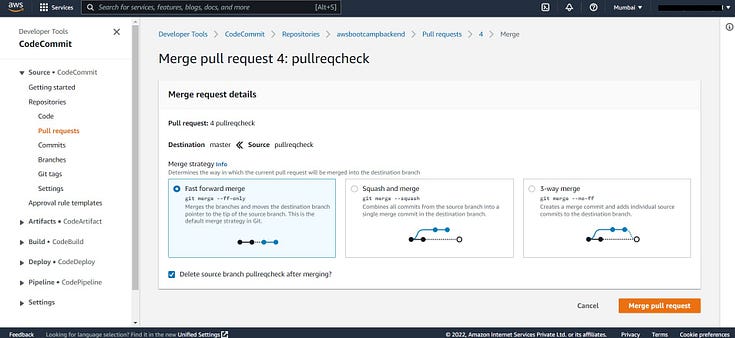
Merge success :
We can see the Success message for the merge done.
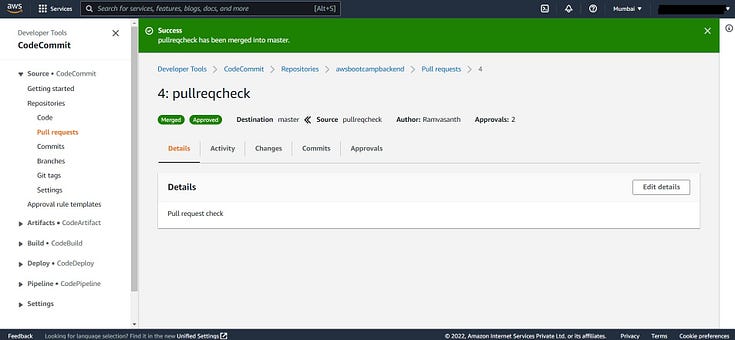
NOTE : Checkout to master branch in your code and do “git pull” to get the latest updated code.
NOTE : Deny merge to master for the one (usually, developer) who created the pull request.
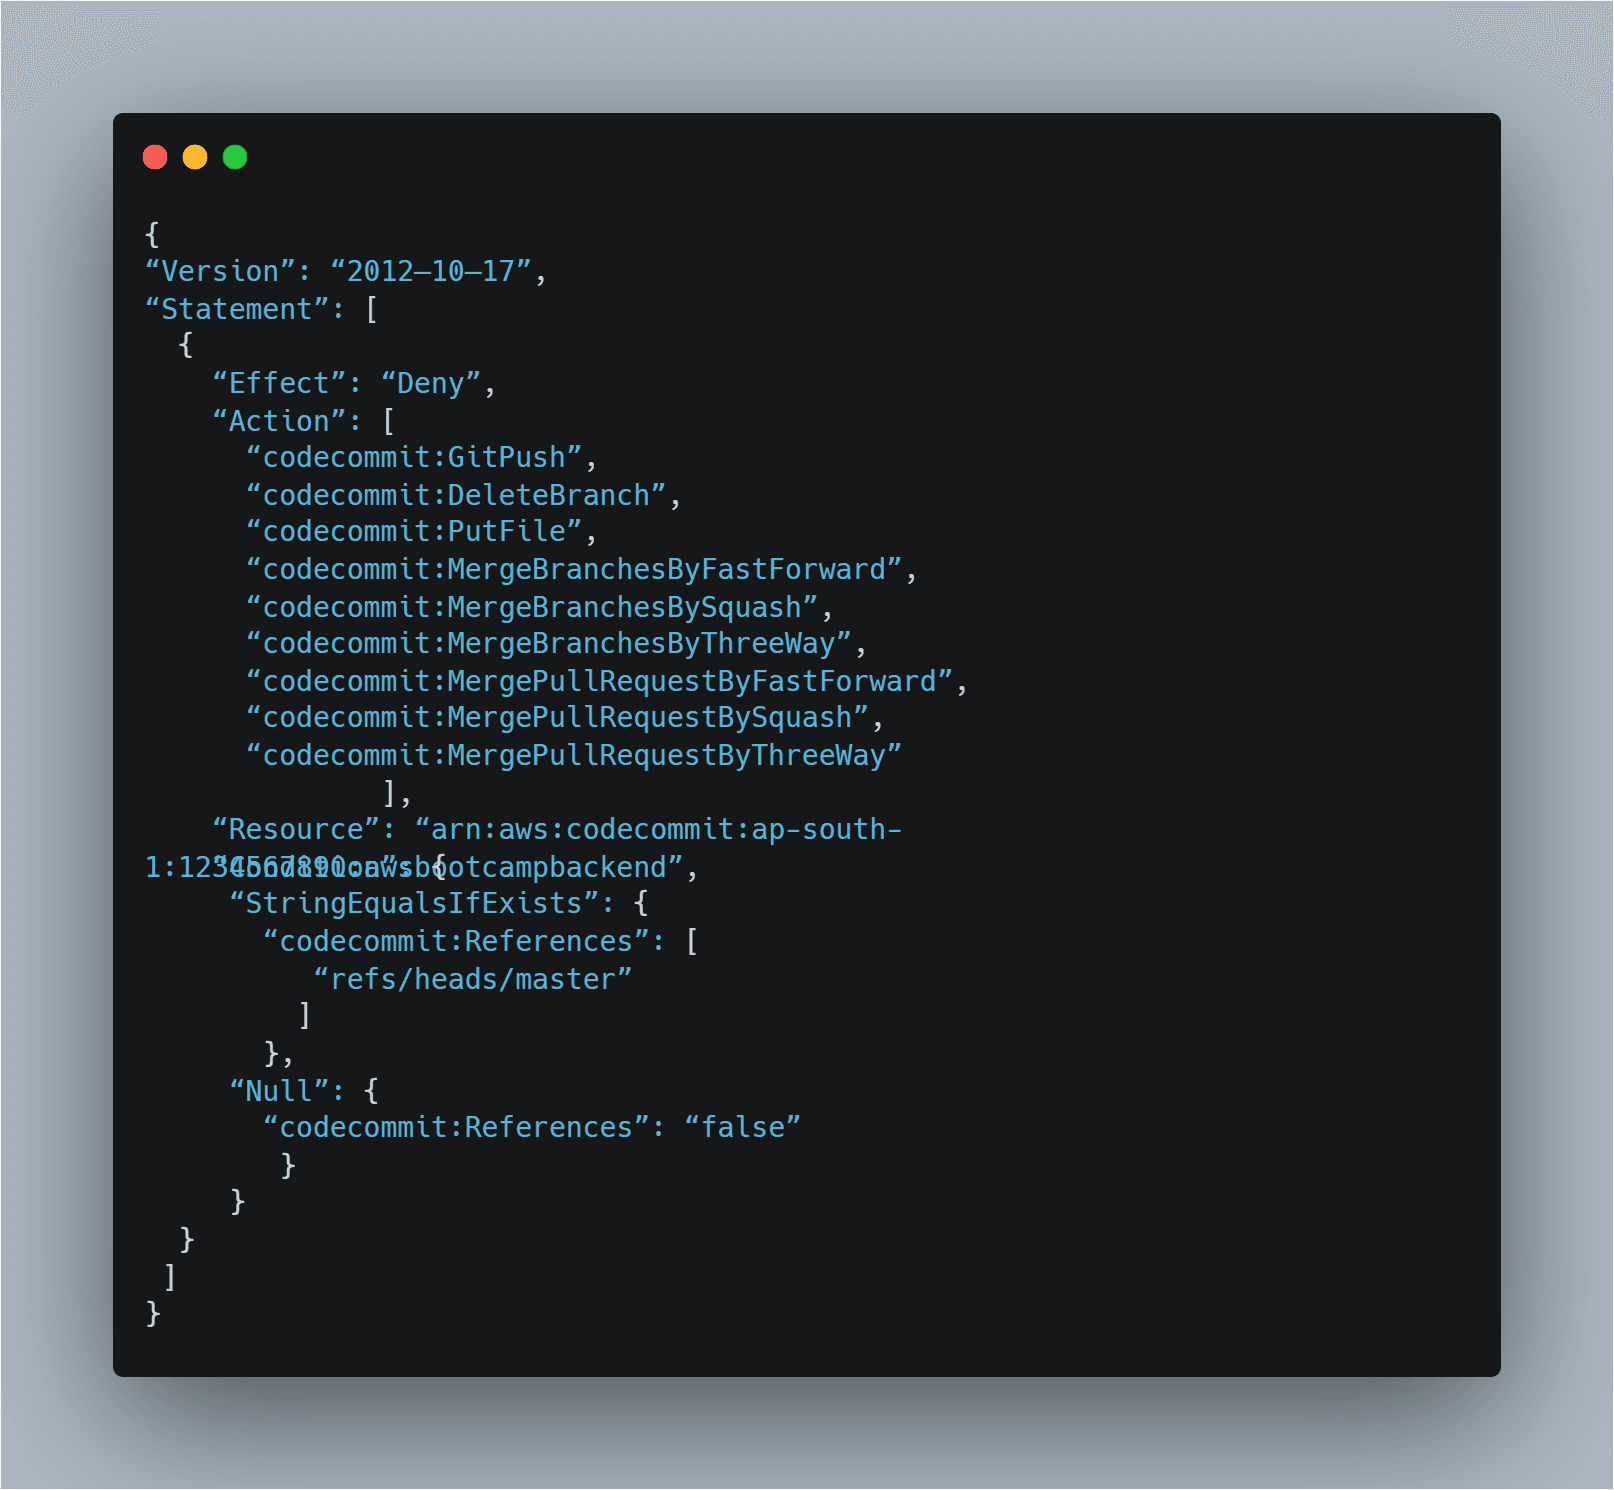
Create a JSON policy and attach the below JSON policy to the IAM user who created the pull request.
Effect -> Denying the merge access to any specified branch ( Possible values : “Allow”, “Deny”)
Resource -> arn of the repository name (can be found in the Settings of the repo)
“refs/heads/master” -> The branch for which the merge should be denied.
If the above policy is added, it denies the developer who created the pull request from merging his/her feature branch to the master branch.
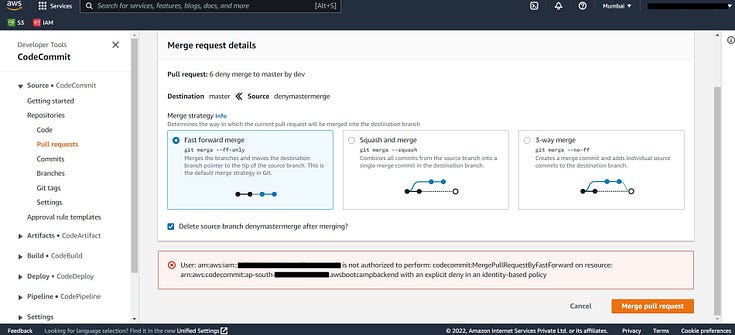
Alternate way — Through AWS CLI :
Step 2 : Create Pull request
Install aws cli and configure the aws credentials for the IAM user, ( if not configured before )
> aws configure
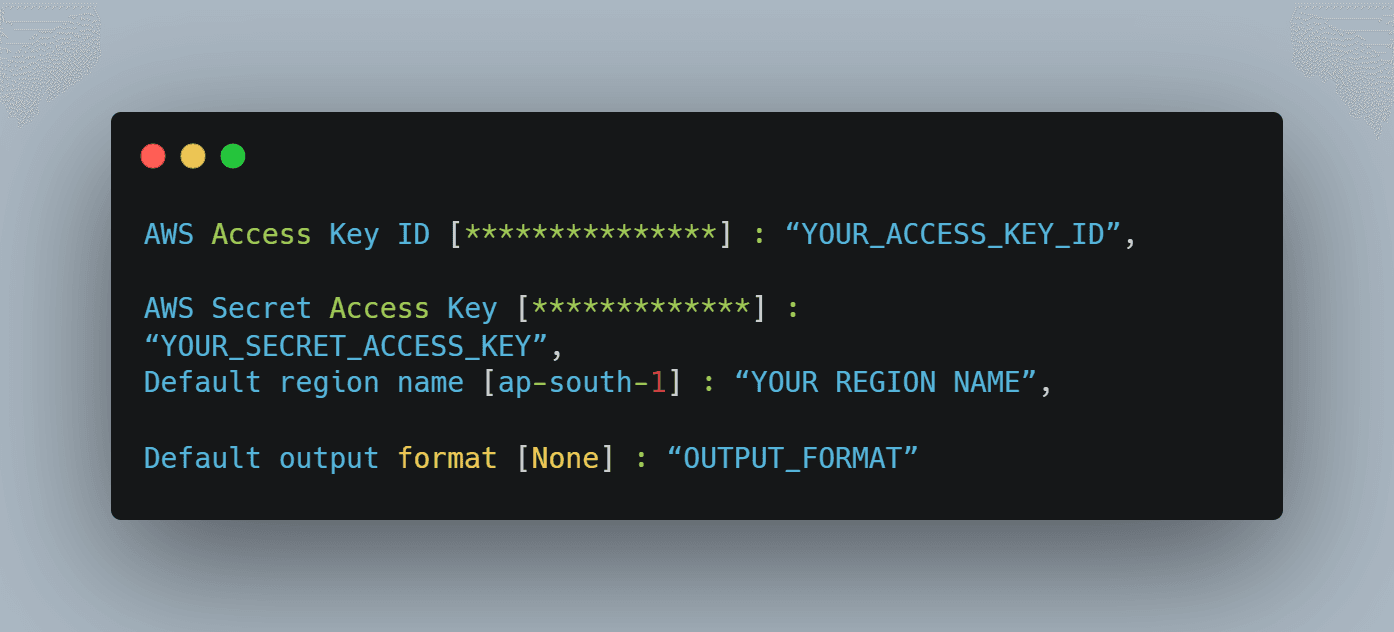
To create a pull request,
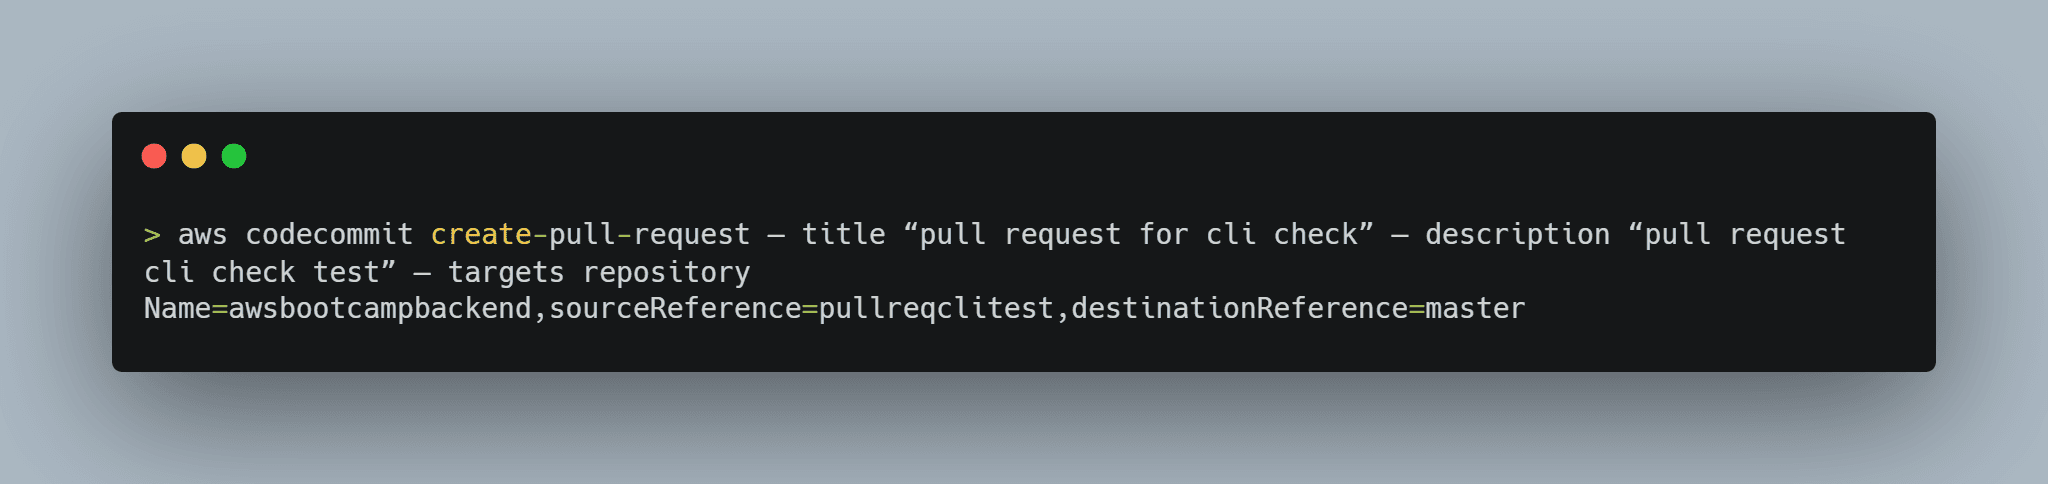
(description is optional)
– title -> Title of the pull request
– description -> Description of the pull request
repository Name -> Represents the name of the repository
source Reference -> Name of the source branch
destination Reference -> Name of the destination branch ( by default, it takes main branch )
If Success, a JSON will be produced as an output.
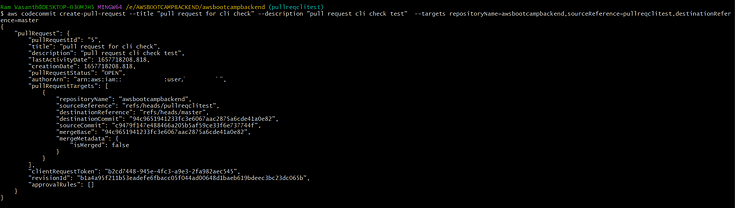
Step 3 (Optional) : Specify the approval rules
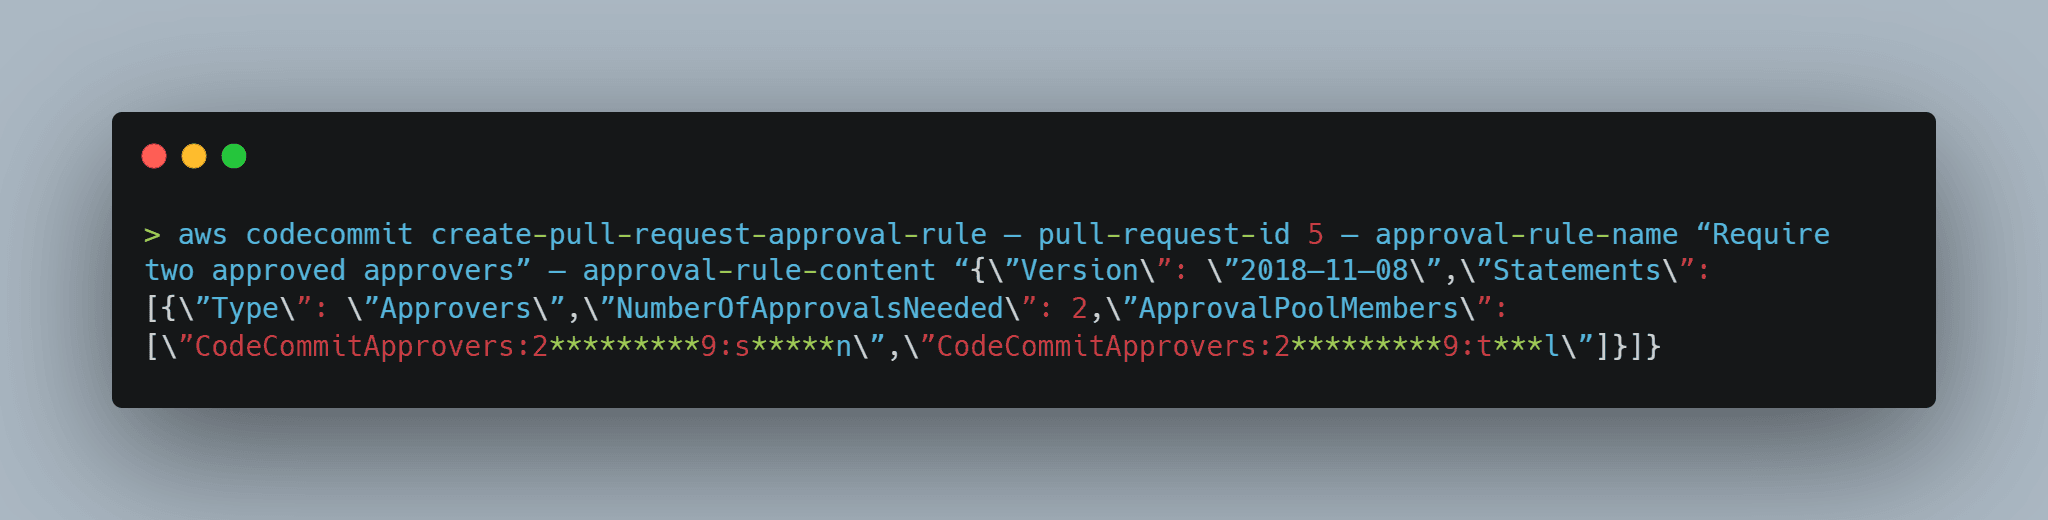
–pull-request-id -> Id of the pull request ( available in the create pull request output JSON )
–approval-rule-name -> Name of the approval rule
–approval-rule-content -> Approval rule content
Version → Specifies the version
'
Statements:
Type -> Approvers
NumberOfApprovals -> The number of total approvals needed for the pull request
ApprovalPoolMembers -> The IAM users who can approve the pull request
If Success, a JSON will be produced as an output.

Step 4 : Approve pull request
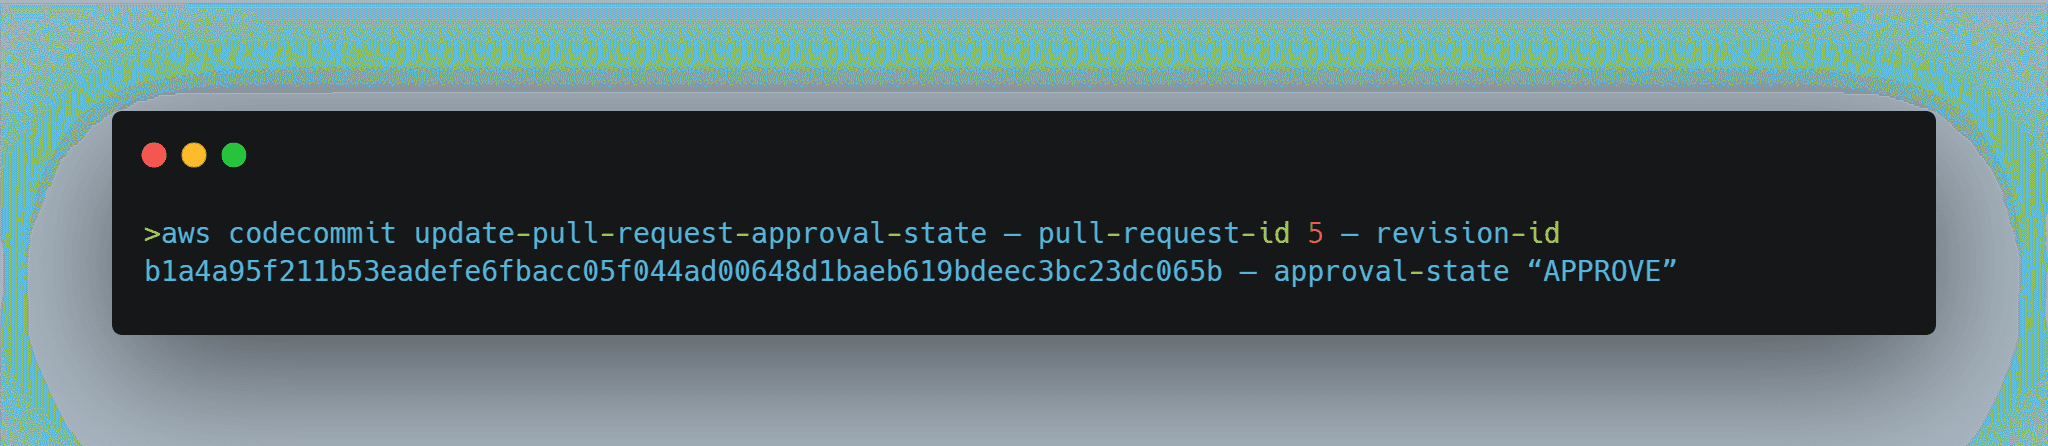
–pull-request-id -> Id of the pull request ( available in the create pull request output JSON )
–revision-id -> Revision id of the pull request ( available in the create pull request output JSON )
–approval-state -> Approval state of the pull request you want to provide ( “APPROVE” or “REVOKE” )
If Success, nothing will be returned.
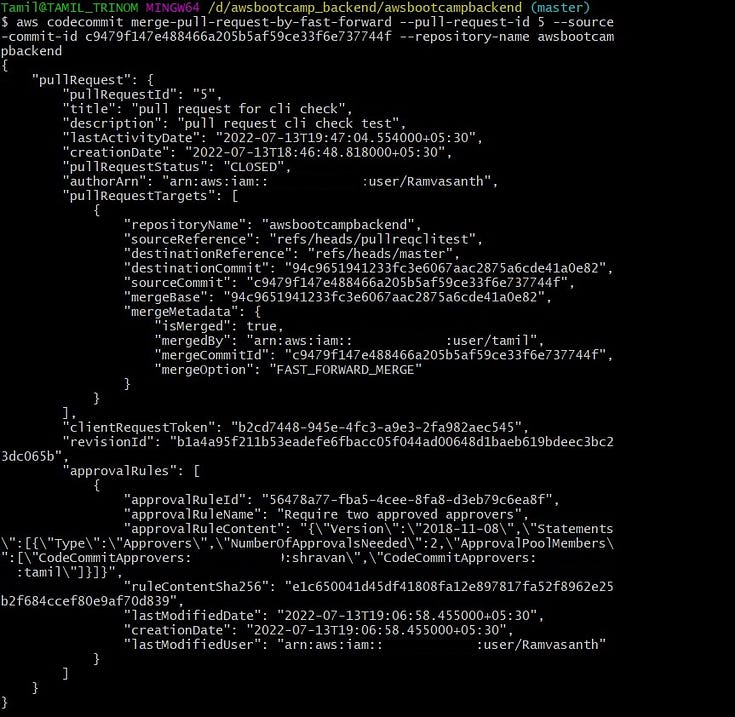
Step 5 : Merge pull request
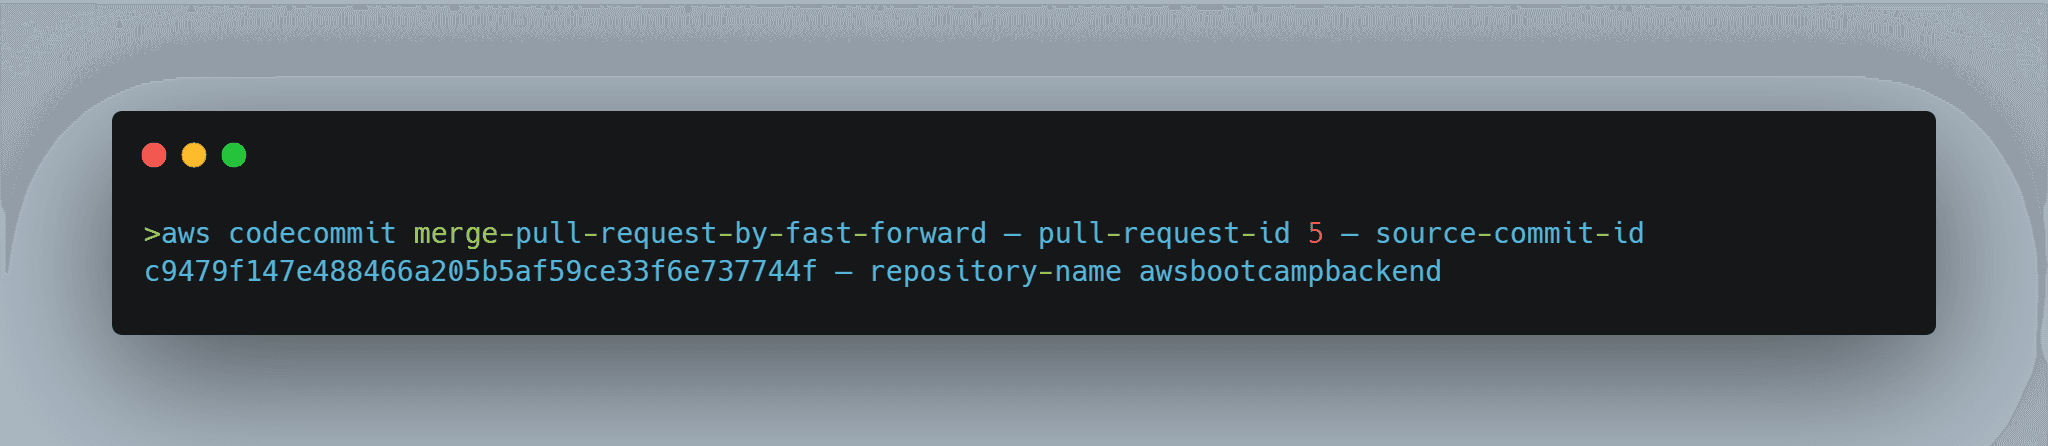
–pull-request-id -> Id of the pull request ( available in the create pull request output JSON )
–source-commit-id -> Source commit id ( available in the create pull request output JSON )
–repository-name -> Represents the name of the repository
If Success, a JSON will be produced as an output.