


Mobile Automation Testing using Appium and Python
Introduction
Appium is an open-source tool you can utilize to automate mobile web, mobile native, and mobile hybrid applications on iOS and Android outlets. Appium is “cross-platform” in that it enables you to create tests using the same API for a variety of platforms, including iOS, Android, and others. This enables significant or complete code reuse between iOS and Android test suites.
We will cover the Windows-Android setup in this article.
Requirements for the setup:
Appium and Appium inspector
Latest edition of Python and JAVA
Android Studio
Emulators
Plugins installation
IDE (VS Code or PyCharm)
Sample test run
Appium Setup:
Download the latest Appium and Appium Inspector
Appium server can be installed using two ways.
NPM install Appium
Install the Node and follow the setup wizard
After Node is installed, open cmd and run npm install -g appium
Enter the Keyword appium to run the Appium server
Download Appium Desktop
Download the Appium desktop
(This is link for 1.21.0 version, with this version we don’t need to install the appium inspector separately. Inspector was in-built until this version)Run Appium and start the server
If you using 1.21.0 or before, the below Appium Inspector installation does not apply. You can directly open the inspector from the Appium server page by clicking the search button.
Download Appium Inspector
Download the Appium inspector
Appium inspector is used to locate the elements and find the paths of the elements in a page
Open the Appium inspector
Download Python and Java
Python Installation
Download the latest version of Python
Launch the installer and install. Check the ‘Add Python to PATH’ checkbox to add the path to the environment path
Open cmd and run the command ‘python’ to check the python is installed properly.
Java Installation
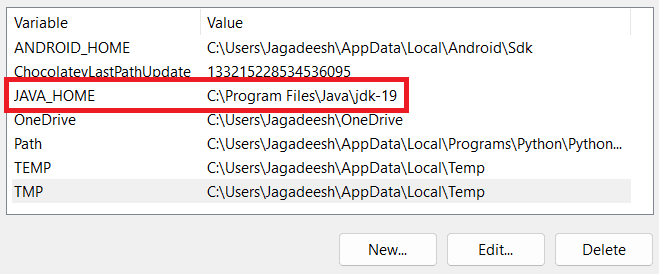
Download the latest version of JAVA Jdk
Add a new path JAVA_HOME in environment variables like below
(Added the JAVA_HOME for the appium setup)
Android Studio Installation
Download the Android studio
Open the Android studio and launch the AVD manager.
Build an emulator on your choice and launch it.
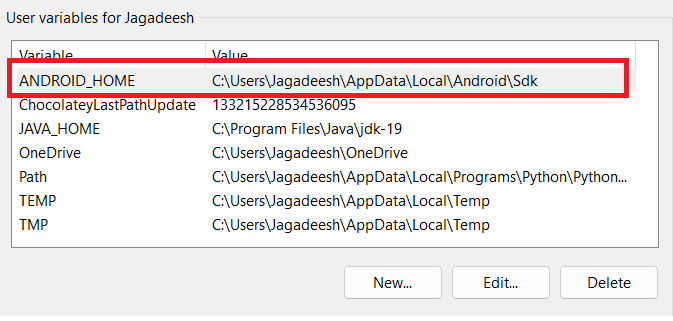
Add the ANDROID_HOME path in environment variables.
(ANDROID_HOME path for the appium setup, here app data is hidden in the folder so you need to change the view settings of the folder to show the hidden files also)
5. Add the base paths of the build tools, tools, and platform tools to the environment variable like below.
Emulator Installation
Download and install the BlueStacks emulator follow the steps provided by the installation process.
(Why we are using the Bluestacks? BlueStacks is lite compared to Android Studio. You can also use any other emulators as you wish or even your actual mobile devices for automation)Open the Settings and in advanced settings turn on the ADB debugging.
Open cmd and enter the command ‘adb devices’ to know the device is compatible for adb debugging.
Plugins installation
Install plugins like Selenium and Appium Python Client
Open cmd and run the below commands
pip install selenium
Install Selenium using this command.
pip install Appium-Python-Client==2.0.0
Install Appium Python Client using this command.
IDE Installation(VSCode or PyCharm)
Download and install the latest version of the VSCode.
Open the VSCode and start writing your script.
Virtual environment setup
Now, all the setups are done, It’s time to begin developing the mobile application’s automation script.
I am using a virtual environment for my project.
Command to create a venv ‘python -m venv /path/to/folder’
I created a folder tests in my venv to write the automation scripts.
Appium Inspector walk-through
Before we start writing the test script we need to locate the elements of the application to write the test scripts.
Run the Appium and Appium Inspector to create the local session.
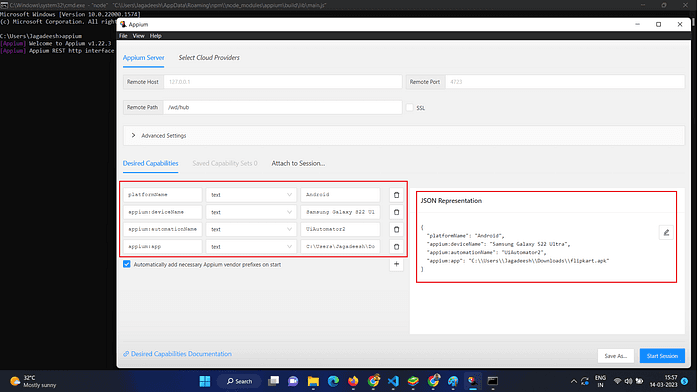
Add the Desired Capabilities as per your requirements (device name and application path) and start the session. It will start the application and shows the application page in the inspector, where you can get the locators such as id, Xpath, text, class, etc. Here I have used the Flipkart application to test.
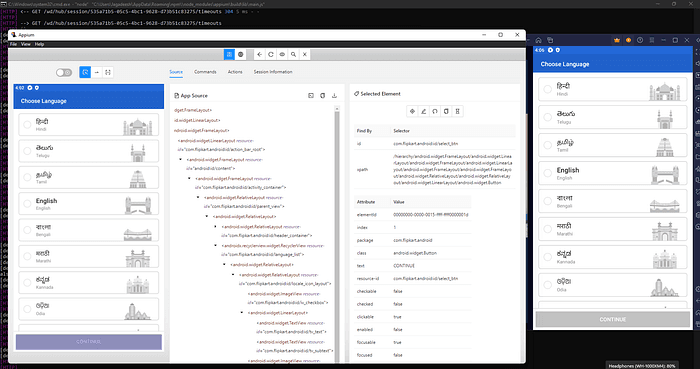
In the above screenshot we can see the first page of the Flipkart application. In that we can get the locators of the elements which we need to locate. Using these locators we start writing the sample test case to run.
Sample test run
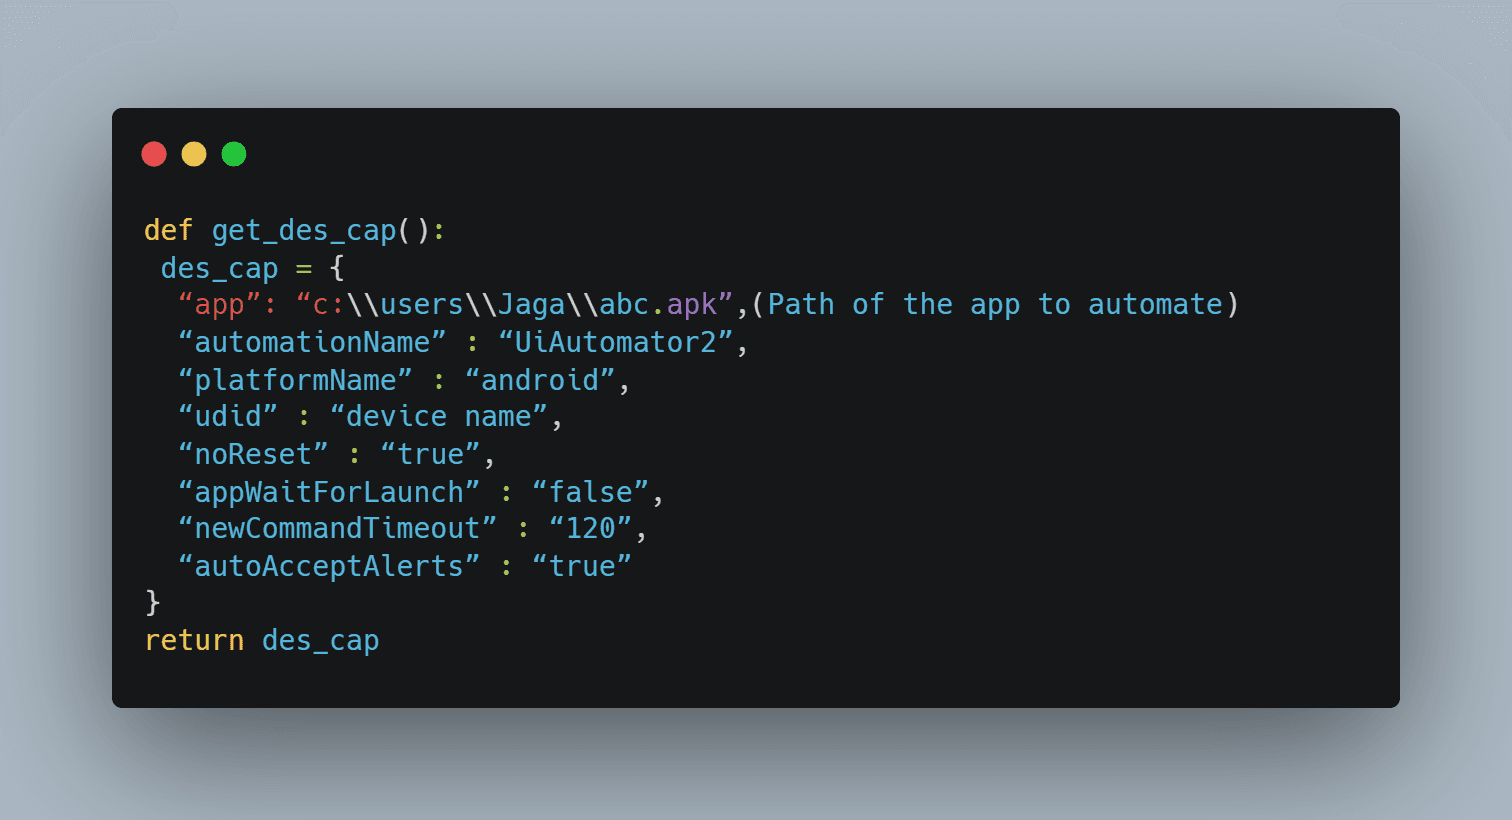
Here we add some desired capabilities in a file ‘des_cap.py’. This is the capability file to run the automation.
Create a test file hello.py to start the basic automation.
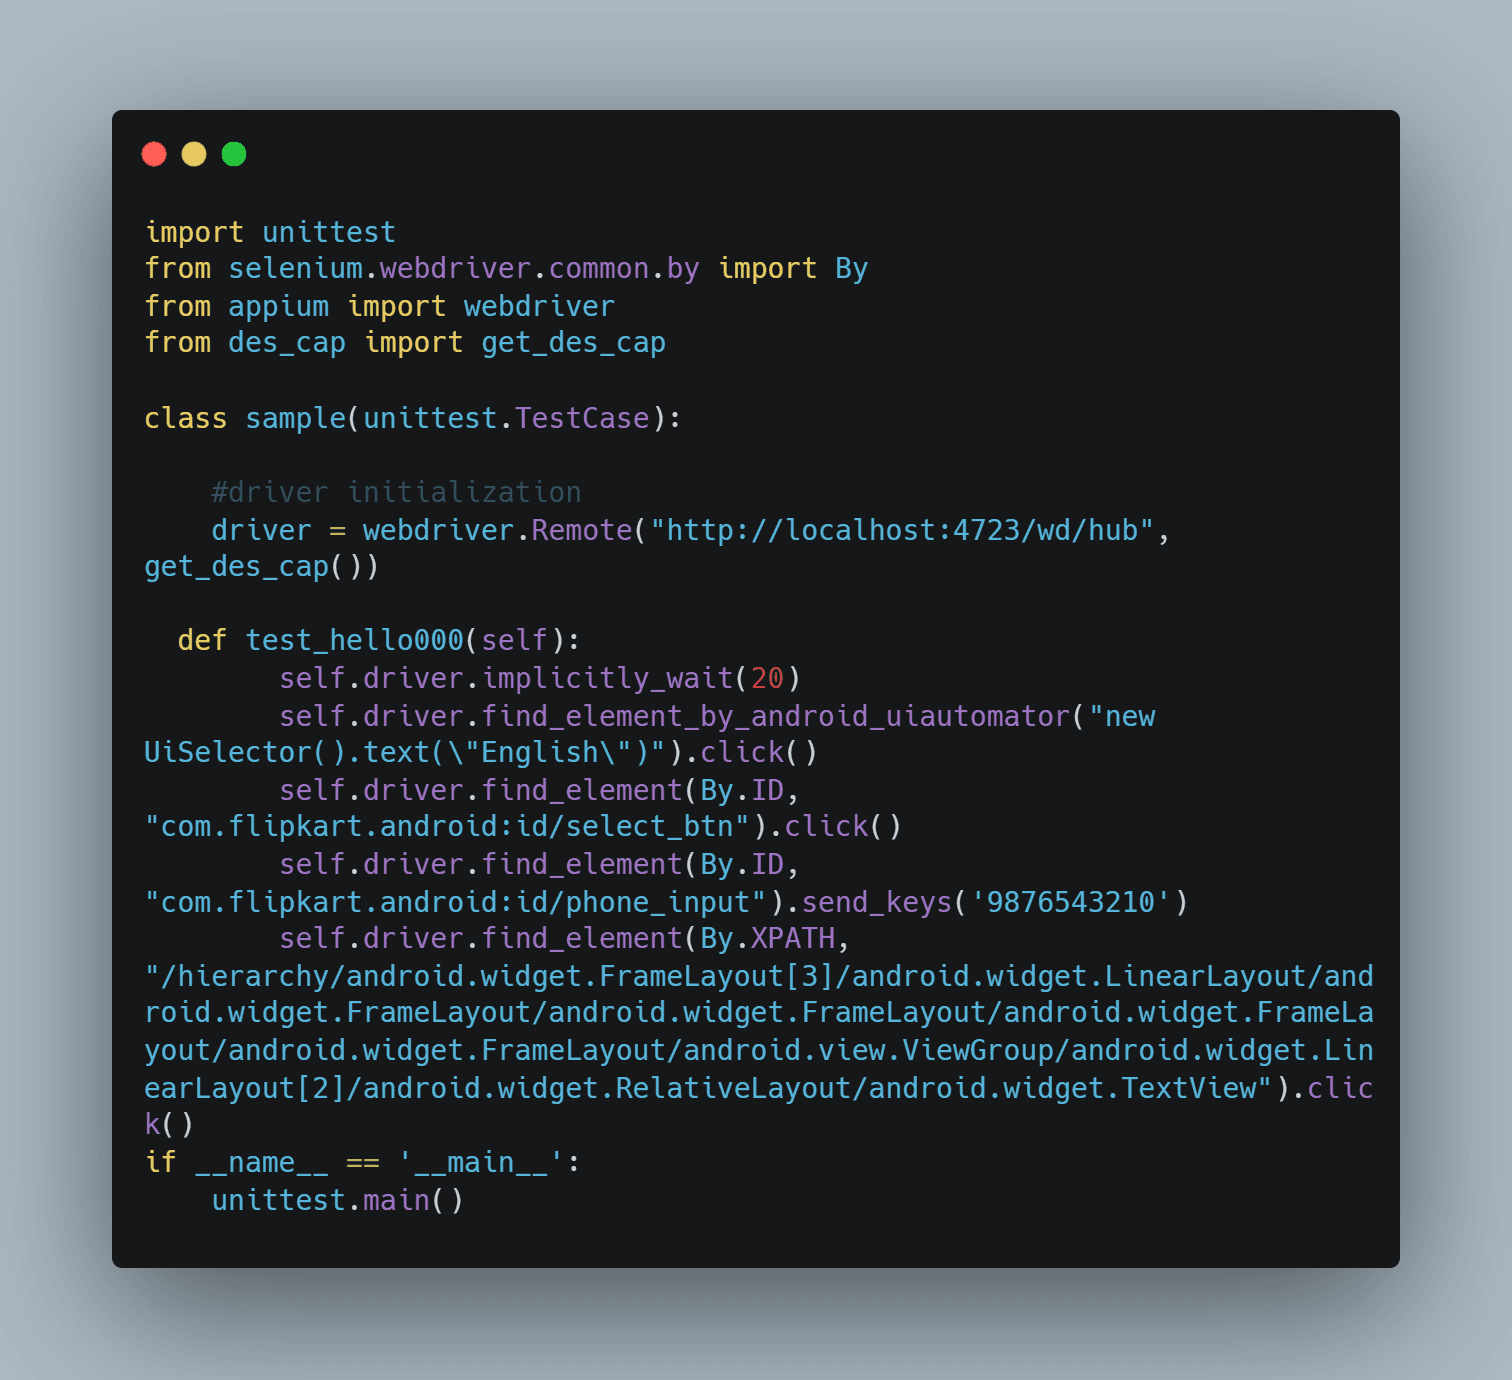
Here I have imported the needed packages and capability file(des_cap) and then initialized the driver. In the automation script, I tried to choose the language using the name of the element, then clicked the ‘continue’ button using the ID, then input the mobile number using the id and send_keys method and then used Xpath to click the ‘next’ button. Here I have used the most important locators to write the script.
This is a sample test run to show how the automation works. You can check the Appium documentation to know more information. Please comment below if you have any queries.